.

Showing posts with label {Giveaways}. Show all posts

{Why a Play House is the Perfect Toy for Imaginary Play}


Simple, Creative Play with a Play House 

Let Their Imaginations Run Wild!


child peeking out the window of a play house
Peekaboo! How's the weather?

Imaginary play is definitely the number one choice for playtime at our house, and the addition of a play house has really helped to make our children's imaginary play come to life! Imaginary play is a key ingredient in growing creative kids and has huge intellectual and emotional benefits for children. It allows them opportunities to explore hypotheses, problem-solve, role-play social situations, develop language and literacy skills, and work through emotional stresses. 

Child with magnifying glass
Imaginary play: Super sleuth on a bear hunt

Having a play house has given our kids so many opportunities to expand their imaginary play, and having a 'life-sized' structure to play out their scenes in makes it all that much more real to them. In fact, we actually have two play houses - a wooden play house outdoors and a cardboard play house [sponsored link] indoors - to support their imaginary play.


Children having a picnic lunch in a play house outdoors
Play house picnic party
at the 'ballet studio'

Below are some of the ways they play with their play houses and some suggestions for props. I recommend placing a basket of mixed accessories in or next to a play house and leaving the rest up to them. If your child wants to engage you in the play, follow their lead instead of trying to direct the play. Chances are, your child has much more imaginative ideas than you could dream up! If your child needs a nudge when it comes to imaginary play, try picking up a prop and starting the ball rolling with an inviting prompt. Something like, "Oh, thank you for this lovely invitation to your tea party! What can I bring?" or, "Excuse me, Doctor, but my baby has been coughing all night. Can you help?" will likely be enough to trigger a scenario in your child's mind.

Child drawing on the walls inside a cardboard play house
Making the play house into an art gallery

Some ways that our play houses are used: [affiliate links provided to some of our favourite props]


*House - they play family roles, baby care, tea parties. Possible props: baby doll, tea set.
*School - Possible props: paper, pencils, math manipulatives, their homework!
*Farm - Possible props: stuffed animals, watering can, baby bottle (for feeding baby animals), vegetables (real or pretend)
*Ice-cream stand - Possible props: scoops, empty ice-cream containers, cash register, play money
*Art gallery - Our girls have drawn their own art inside their indoor play house, complete with frames. Possible props: paper, markers, paint or crayons, homemade paper frames
*Puppet theatre - The windows of a play house make a perfect stage for a puppet show! Possible props: puppets, piece of fabric taped up for a curtain
*Tent/Camp - Possible props: sleeping bags/blankets, pillows, marshmallows
*Circus - Possible props: leotards, hula hoops, stuffed animals
*Book nook - a play house makes a wonderful, quiet spot to read. Possible props: basket of books, cushions, lamp (we have the cord running out of a window to the outlet)
*Shop - Possible props: cash register, play money
*Gardening/Garden centre - Possible props: watering can, kids' gardening tools, plastic flowers and pots
*Dog breeder's kennel (a favourite these days!) - Possible props: toy dogs, ribbon to use as a leash, brush, bowls
*Rabbit caretakers - Possible props: stuffed animals, real or pretend carrots
*Dentist office - Possible props: flashlight (our kids use these invisible ink pens with UV lights), medical mask, tongue depressor
*Doctor's office - play medical kit  
*Vet - play medical kit and toy animals
*Picnics - serve a snack inside (way more tasty than when it's eaten at the table!)


children decorating and playing in a cardboard play house
Our decorate-your-own indoor play house

Our indoor play house is a Villa Carton XXL House [sponsored link], which is a brilliant creation - a cardboard house that comes flat and pre-printed in black and white to look like a country farmhouse that you put together and let your kids colour/decorate themselves! My girls (and I) LOVE Villa Carton products (you can see our review of the Villa Carton City Blocks here). They are the perfect combination of creativity and imaginary play. And while it would be possible to make your own cardboard box house out of a regular box, my girls love the 'real house' look of the Villa Carton house (and Daddy Pea much prefers it to having a regular cardboard box in the living room!) To colour it, they used a mix of paint, markers, and crayons (they especially enjoyed colour-mixing to make brown paint and using it to paint 'mud' on the tractor!) They added their artwork in frames that they painted on the inside walls. You could also make pretty paper frames with an open top to change out the artwork. They strung up some sweet star-shaped fairy lights inside, and have kitted it out with a cosy blanket on the floor. As you can see in the pictures, the colouring and decorating are ongoing (which is one of the things I love about it - both the creating and the play go on and on!) Our next project will be to make some paper bunting to add to it.

child having a tea party with her toy dog
Imaginary play: Tea party for Pinkie

For more pictures of how my girls created and decorated their play house, click here.


https://www.e-junkie.com/ecom/gb.php?ii=1346032&c=cart&aff=219646&ejc=2&cl=206960


Photobucket

(Please note that we received the Villa Carton XXL House for free to try out for review. As always, all opinions expressed are my own.)


{And the winner of the Sun Scholars Summer Learning Program is...}


Thanks to everyone who entered the Sun Scholars Summer Program giveaway! It was great to hear about all the fun things that you all have planned for your kids to do this summer! What lucky kids we all have! ;-)

The Sun Scholars Summer Program is a super resource for anyone who wants to keep their kids busy, entertained, and learning in a hands-on way this summer! It's organized into 12 weekly themes, and will have you prepared for a whole summer's worth of fun activities covering a wide range of subject areas. Your kids will be so busy having a blast with these hands-on, practical activities, they won't even notice that they're educational, too!

Our winner of a free downloadable copy of the Summer Program, randomly selected through Random.org, is Jan, who said that they are planning to learn about insects and bats and then go on a Bat Watch where you can watch the bats fly out from under a bridge - sounds like a wonderful, memorable, learning experience for your kids, Jan!

So Jan, please contact me within 48 hours to claim your prize. Otherwise a new winner will be randomly selected. You can reach me at the email address given under the 'contact' tab above.

Congratulations!!

If you didn't win, the full program is currently available for purchase for only $30, or you can get a free sample week here. Or better yet, you can enter to win again at B. Inspired Mama - her giveaway is open until midnight tonight!

Thanks again to all who entered - I hope you all have a fun-filled summer with your kiddies!

Photobucket

{Mermaid Waldorf Doll Tutorial: Time for Mama}


Welcome to the second instalment of the Time for Mama: Creative Playtime for Moms series! This month I am SO SUPER EXCITED to share this guest post from The Monko at Taming the Goblin. She has made the most perfect mermaid doll to kick off a month of mermaid-themed posts here at Mama Pea Pod! I'm officially declaring June to be Mermaid Month at Mama Pea Pod :-) And best of all, The Monko is giving this swimming sweetie away! Read on to find out how you can make this adorable little mermaid your own.


TUTORIAL FOR BEGINNERS BY A Beginner

by The Monko @ Taming the Goblin 

I am delighted to get a chance to share my craft learning with you as part of this great series 'Time for Mama'. Before I start I should warn you that I am not a skilled sewer and I am certainly not a perfectionist. I don't measure things and I do most of my stuff through guess work and visual judgement. I sew because I like it, but neat finishing bores me, so I don't do it - which is why I could never do this as a job. So with that confession out of the way (and you will see what I mean further down this post), lets begin.
If you'd like to make a Waldorf inspired mermaid doll you will need:
  • About half a metre squared of jersey material - which ever flesh colour hue you want
  • A small amount of gauze bandage
  • An old sock
  • About half a carrier bag of wool roving (this is carded and cleaned unspun wool for stuffing)
  • Black and white embroidery thread
  • White thread
  • A ball of five point yarn  - or other chunky yarn for the hair
  • Material for garments and a tail - your own old clothes are good


I recommend sticking to the Waldorf principles of using natural materials. Sheep wool as stuffing will warm to your child's body when they hug the doll. All the materials are available on line, just don't make the mistake of typing in Waldorf doll fabric - suddenly the jersey material is three times the price (I get mine on Ebay).

Take your old sock and make it into a ball. Wrap a chunk of roving wool around the sock and smooth it, let any end bits hang down as a 'neck'. Take your gauze, hold the ball up to the gauze to gauge the width you need (I told you I do it all by sight), and cut yourself a rectangle the width of the ball and a bit longer than the ball. Sew the rectangle on three sides leaving the bottom open. Put a running stitch across the top of the rectangle and pull. Turn the gauze bag inside out so the gathered bit is on the inside of the bag, and pop the wool and sock ball into the bag.


Tie white embroidery thread around the bottom to seal the bag making a separate head and neck. Pull the thread over the top of the ball and tie it down to the neck. Then run a thread around the ball cutting the 'face' in half - this will give you a dent where the eyes will be (See top left corner of head collage below). Just below the thread that divides the face take a needle and normal thread and pick out a nose by working the thread back and forth through the gauze (catching some of the wool) in a circle. See the diagram below so it makes a tiny bit more sense. 
Now you have the basic head you need to cover it in jersey material. Take a folded rectangle of jersey material. Stretch the fold over the nose and 'face' part of the head. Then fold down and tuck in the edges. Pin and sew. This sounds easy enough but believe me this and the shoulders are the two most tricky bits of making the doll. Bear in mind that the hair will cover the seams. The bit the hair won't cover is the chin to neck join. Take some extra time to smooth and work this area. I usually put a stitch or two into the neck to separate the neck and chin. 

Now its time to make the arms and body. I usually fold the material in four and cut one arm so that when you unfold it it makes two folded arms.  I have provided a PDF pattern at http://dropcanvas.com/rbz2b for the body and arms. As you can see from the picture below the body I made is slightly bigger than an A4 sheet of paper. So I have added a dotted line on the pattern. When measuring your material you need to fold down the top to the dotted line to create the height for the shoulder area. Please remember that this pattern will only work if your head is roughly the size of a tennis ball. If your head turns out bigger or smaller you will need to adjust the size of the body so it matches. 


Sew around the arms leaving about an inch gap in the middle to allow you to stuff them. Do the same with the body but start sewing about two inches from the top of the neck and stop two inches from the neck on the other side. Then turn them inside out. When stuffing don't ram too much wool into the arms and legs. This is because a) the doll will feel nicer if it isn't stuffed too solidly and b) the more you ram in the more the jersey wool will stretch. The first doll I made ended up with ridiculously long arms and legs because I pushed far too much wool in.


Before sewing the head onto the body I recommend sewing the eyes. I think the eyes are the most important bit of the doll and if you make a mess of them once the head is sewn on there is no going back, but if you do it before you sew it all together you can always recover the head and try again. 
To sew the eyes get two pins and position them where you think you'd like the eyes. I usually put them quite far apart on the dent line. Then tie a knot in the end of the black embroidery thread and go in from the ear - or further back. Come out exactly where you placed your pin, then sew three or four loops to create the eye. Take the last stitch back to the ear and cut the thread - it will hold without having to tie it off.

I don't put mouths on my dolls. The idea behind Waldorf dolls is that their expression is neutral so that the child can project their own emotions onto the doll. I have seen a lot of Waldorf dolls that do have mouths but personally I think it is harder to project your own feelings onto a doll if the doll has a mouth which conveys an emotion that doesn't match yours. However its entirely up to you whether you want to give your doll a mouth.

Now the hardest bit, sewing the shoulders. You need to fold the front and back up, over the arms and pin to the neck. Then pin around the arms making sure to fold in the rough edges. I usually sew round the arms first and then finish off with the shoulders. And here is where you can see that I am not a perfectionist and that my visual judgement is not always that accurate - Can you see that I have made one arm significantly longer than the other. If I was a perfectionist I would unpick the shoulders and move the arms across. But I'm not so I didn't. It gives the doll character.


Finally you need to add the hair. I usually make the hair longer and then trim it up. So I take my ball of yarn and loop it from my hand to elbow until I have a full hand of hair (you can always add more later). While it is still in loops I lay it out on the doll's head. Rather than pinning it I go straight for stitching it roughly with a thread of a similar colour to the yarn. Start a little bit back from the forehead and anchor the thread, then lay out a few lines of yarn down to the forehead and stitch these on. Then just work your way back in one straight line laying the yarn down and stitching it onto the head until you get to the nape of the neck. When you have finished snip the loops and trim the hair so it is the length you desire.
If you leave it there the sides of the head will be exposed. There are several ways to deal with this. The one I use is to bring some of the hair forward and stich it to the sides of the face and then anchor odd bits of hair hear and there to cover the rest of the head. If you want to make a merman I have a boy doll hairstyle tutorial.

There you have your basic doll. How you dress her is your choice. I made my one a little tankini. Because the dolls head, with all her hair, is much bigger than her shoulders, it is easier to make clothes that wrap around rather than go over the head. So the tankini has a little button at the back so it can be taken off.


Now call me ridiculous but I worry about her getting cold so I wanted her to have a cardigan. I have an old jumper that I have been using to make other things. It has a lovely pattern and some ribbed bits. I have found a neat trick when making doll's garments is to use collars and trim from your own old clothes. So I used the neck of a T-shirt to make the waistband of the tankini bottoms, and I used the collar and cuffs of the jumper to make the cardigan. 


Finally, and most importantly I made the mermaid tail. I found an old pair of dungarees I had in my funky hippy days. They had a lovely patchwork effect that looks great as scales for the tail. I drew round the dolls legs and then added some extra length for the tail end. I loosely stuffed the tail end. Around the waist I added some elastic and lined the tail with silver shimmery material, the only bit of the doll not completely natural - I couldn't resist, it shines through the green when it catches the light and makes it look fishy.

And this is what she looks like with her tail on.


I'm running a competition over at Taming the Goblin this month, to win this doll. All you have to do is link up something (ANYTHING) you have done that was inspired by this mermaid doll. If you don't have a blog you can still enter. Just email your project to tamingthegoblin [@] gmail [dot] com. The competition is open to international entries. Of course you won't need to enter because now you have read this tutorial you will be making your own, right? But why not come and check out what other people have been up to. And happy sewing.


Photobucket

{Ocean Waves in a Bottle & Sun Scholars Giveaway!}

child testing how waves work with DIY ocean in a bottle

Princess Pea is turning 5 next month - ack! (Slow down, slow down!) The debate about the best time to begin your child in school is raging, both on the internet (read here and here) and in my head, but I have come to a decision that I believe is the best for Princess Pea and our family.

I've mentioned before that we love her Hungarian preschool because it is 100% play-based. Although she moved to a new preschool when we moved house in February, her new one is of the same philosophy. She settled quickly and happily into her new class. We also love that as long as the weather is nice, they seem to spend pretty much the whole day playing outdoors.


On the other hand, she will eventually (probably in 1st grade) go to the private school where we work, which has a strong academic focus, even in the early childhood department and particularly in kindergarten. So entering in 1st grade might be a bit of a shock to her playful, little system. As well, the art and music programs at our school offer wonderful experiences to develop creativity and imagination of the kind that her preschool system is unable to provide, mainly due to lack of resources.


So the compromise we've (more or less) decided on is to keep her in her play-based preschool, while homeschooling her on the side in some of the skills that would be expected of her if she were at our kindergarten. That way, she will learn the skills, but still spend 95% of her day playing, creating, and  imagining, and will still spend lots of time playing outdoors (as opposed to two 20-minute blocks of outdoor play time).


So, with this plan in hand, I've decided to start a first 'unit of study' (gosh, it feels weird to say that in reference to my own little Princess Pea!) built around an ocean theme. We are planning an upcoming mermaid-themed birthday party, so there's lots of interest in under-the-sea life around here at the moment. I'm going to latch on to this current interest as a means to incorporate some of the kindergarten standards and benchmarks.


I'm still in the early planning stages, but my plan is to incorporate a little literacy, a little numeracy, a little science, a little art, a little music (yikes! not my strength at all!), and a whole lot of fun inquiry into this ocean theme.


I'll share more about my plans as they develop, but in the meantime, I wanted to share with you a great resource. Whether you homeschool, summer school, or just want some ideas of fun, educational activities to do with your kids this summer (or any time, really), you might be interested in the Sun Scholars Summer Program, offered by Rachel over at Sun Scholars.


Rachel has been kind enough to share the program with me to try it out, and to also offer a free copy to one of you lucky Mama Pea Pod readers!


I've been going through the downloadable program, and the first thing I noticed is how well-planned and organized it is. Rachel has thought of everything! She has built a curriculum around weekly themes (including a 'beach' one that will tie in nicely with our ocean theme). Each weekly theme includes some hands-on activities in each of the subject areas - literacy, numeracy, the arts, science, etc., and is organized into daily activities that are printed on individual cards that you can print out, keep in a binder, and take out as you need each one. The curriculum is designed for multi-aged learners, so even if your kids are different ages, you can pick and choose which activities to do, or follow the suggested modifications for each different-aged child. The package comes with a handy list of supplies you'll need, to help you get organized in your planning, and many printable materials, too.


So, to introduce our ocean theme, we followed the instructions given to make ocean wave bottles. These are so cool! At first I thought about skipping the oil in the ingredients, but I'm so glad I didn't, as it really creates the wave effect, making the water roll, just as a real wave would out in the ocean. We had so much fun with these! We used some empty water bottles, a handful of sand from the sandbox, water, blue food colouring, some blue glitter, and some cooking oil. We also popped in a couple of shells, though you can't see them as it turns out.


young children making ocean in a bottle
 

We've also tried the squishy bags and the strawberry mice. We filled ziploc bags with shaving foam, a bit of glitter, and a few drops of red and yellow paint. As the girls squished them, the paints blended to make - surprise! - orange. While Sweet Pea squished and squashed and rustled the bag, enjoying the sensory play, Princess Pea attempted to write letters in the foam, through the bag. It was all fun and games, until she squished it a bit too hard and it squirted out and a spot hit her in the mouth - yucky! (Mummy's fault for not following all the instructions and taping up the end of the bag - oops!). Older kids could practice spelling words with them, too.


And when Daddy Pea brought home a big carton of strawberries for a treat, what better treat than making them into cute strawberry mice? These snacks are part of the unit built around the story, "If You Give a Mouse a Cookie". I didn't have all the same items on hand as in the suggestions, so we improvised a bit. How cute and fun! A great way to get kids helping out in the kitchen. They could even use them to reenact the story or make up a play of their own before eating them up for their snack!

Other activities that have caught our eye include making a family tree, testing out sound energy with musical glasses, experimenting with colour-changing milk, and making a beach bucket cake!


If you're interested in finding out more about the Sun Scholars Summer Program, head on over to Rachel's blog, Sun Scholars. And if you'd like to enter to win a FREE copy of the summer program (in digital format for downloading), just leave a comment below telling me a fun activity that you plan to do with your kids this summer!

This giveaway will be open for a week, closing on June 2nd at 8pm, GMT+1. A winner will be selected through Random.org and will be announced here in a blog post. The chosen winner will have 48 hours to contact me to claim their prize, or a new winner will be selected. For additional entries, you may share this post on Twitter (tag @mamapeapod) or Google+. Be sure to come back to leave an additional comment for each entry to be counted.

Good luck and happy learning!

http://www.mamapeapod.com/2014/05/three-to-five-playful-preschool-new-resource-parents.html

Photobucket

{Mama Pea Pod Necklace - Giveaway!}

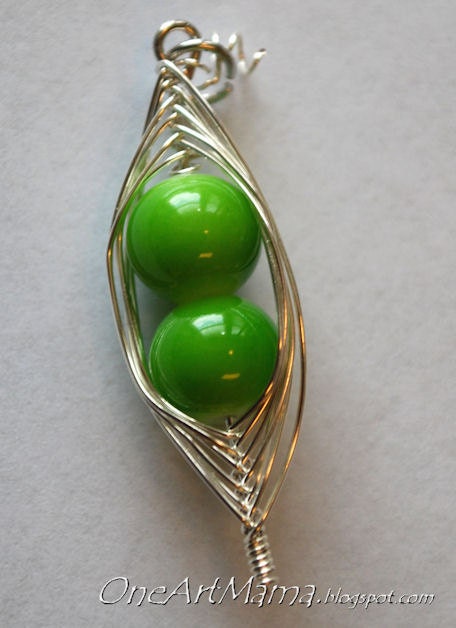
Sweet Peas in a Pod Necklace

I recently passed the 300 Facebook 'likers' mark - quite a milestone for little old me! To celebrate and to show my appreciation, I wanted to have a special giveaway. But first, let me tell you how I found this beautiful gift.

A couple of months ago, just as I was preparing to go back to work full time and feeling very sorry for myself about having to leave my little peas all day long, I came across this featured guest post at Delicate Construction. The guest being featured was Amy of One Artsy Mama. I clicked on over to her blog and immediately noticed this picture of a pea pod necklace from her etsy store.

Well, of course I fell in love with it immediately and needed to have it! (I am Mama Pea Pod after all, right?) And I thought it would be the perfect way for me to 'hold onto' my little peas all day long throughout my workday.

So I ordered myself one to try to cheer myself up. It arrived very quickly (shocking for the Hungarian postal service! And even unopened!), all wrapped up very sweetly. I was so excited to get it; I just LOVE it!

In fact, I'm going to order the matching earrings for myself and another necklace for a friend for Christmas (ssshhh, don't tell!). The prices are super reasonable and One Artsy Mama even offers free shipping to select countries!

So when it came time for an extra special giveaway, what better way to show my appreciation?

** Lovely Amy kindly agreed to let me host a giveaway of one of her beautiful jewellry pieces for Mama Pea Pod readers! If you win, you can choose a piece for yourself (or as a gift? Holiday season is coming soon, you know!).

All you need to do to enter is visit the One Artsy Mama Etsy store, browse around, then come back here and leave a comment telling me which piece you would like to win.

(If you'd like to also follow us, please feel free, but it's not mandatory for entry and will not increase your chances of winning. If should choose to, however, you can follow One Artsy Mama on GFC, Facebook, Twitter, or Pinterest, and you can follow Mama Pea Pod on GFC on the sidebar, Facebook, Twitter, or Pinterest.)

Now, because this came about because of reaching a milestone for my facebook page, I also want to show you that I 'like' you too! So if you have a facebook page of your own, please leave the link with your comment and I will 'like' every page linked here, too (if I haven't already).
The winner of the giveaway will be selected randomly through Random.org.

If you'd like additional entries, you can mention this giveaway on twitter or write a blog post linking to it. Please come back and leave a separate comment for each entry (and a link to your post).

Contest is open to US/Canadian/Hungarian addresses. Contest closes November 6th, 2011, 11:59pm GMT+1.


Photobucket

{Giveaway Winner! My Memories Suite Digital Scrapbooking}


We have a winner!

But before I announce who won the free copy of the My Memories Suite digital scrapbooking software (a $40 value), let me remind you that if you didn't win, you still get the special discount for all Mama Pea Pod readers! If you use the special promotion code below, you will receive a $10 discount off the purchase of the My Memories Suite Scrapbook software and a $10 coupon for the MyMemories.com store - that's a $20 value! Just copy and paste this code at the checkout when ordering the software for download from the My Memories Suite online store: STMMMS98286

And the winner of the FREE software is entry # 6: Brooke of Let Kids Create! Congratulations Brooke! Can't wait to see what creative ideas you come up with!

Photobucket

{My Memories Digital Scrapbooking: A Giveaway!}


(and $20 value coupon code for Mama Pea Pod readers! Enter STMMMS98286 at checkout.)

Do you scrap?

I'm a wannabe scrapbooker. I have all the stuff. Hundreds (thousands?) of beautiful papers, brads, stickers, ribbons, frames, cutting mat, hole punches, paper punches, etc. etc. etc. Have I ever actually completed a single scrapbook page? Nope! I've done a couple of shadowboxes, but not one finished page in an actual scrapbook!

As with everything I have a perfection issue. I'm afraid to ever complete anything in any sort of permanent form because it's never quite 100% perfect. Neurotic? Definitely!


But I recently was contacted by My Memories Suite, an award winning digital scrapbook software company. My Memories Suite is rated #1 by Amazon and TopTen Reviews. With their software, you can create digital scrapbooks, photobooks, cards, calendars, and gifts.

Digital scrapbooking? Hmmmm....that sounds like my kind of scrapping! I can play around, save, delete, alter, whatever I want, indefinitely! Oh yeah, and if I ever actually decide on finalising anything, I can even print it or order prints, too :-p  It'll be perfect for our family calendar.


So, I downloaded the software, which comes with templates you can use or allows you to create your own pages from scratch. It also came with a $10 coupon to use in their online store, so I went back to the website where there were oodles and oodles of choices for beautiful kits of 'papers' and embellishments you can purchase. There are quite a few free page template kits to download too.


I'm not really a techy person, but there is a detailed user guide to help you. Once I figured out how to do it, I made these two little practice pages to start. It really was fun to use! The one above was made with a freebie 'quick page' template called Time to Play, where all you have to do is plug in the pictures. Can't really get much simpler than that. And I love the cute playground theme! (There's also a whole Time to Play kit available to purchase, too.)


And this one I created myself from scratch. I think this makes a great way to record and share your family's memories - like these lovely pictures my friend Maribeth took for us last spring :-)


Now I just have to decide between getting the Pea in the Pod kit next or the Backyard Play Day kit next. (Suggestions welcome!)


And guess what? My Memories Suite is offering a special discount for all Mama Pea Pod readers! If you use the special promotion code below, you will receive a $10 discount off the purchase of the My Memories Suite Scrapbook software and a $10 coupon for the MyMemories.com store - that's a $20 value! Just copy and paste this code at the checkout when ordering the software for download from the My Memories Suite online store: STMMMS98286

And there's more: They have also offered to give away a free copy of their software (a $40 value) to one lucky Mama Pea Pod follower!

Here's how to enter to win:

1. MANDATORY: If you're not already, please first become a follower of Mama Pea Pod. (You can follow me on Google Friend Connect over on the sidebar there, Facebook, Twitter, or Pinterest.) Then go to My Memories.com and check out their digital paper pack kits, and come back and leave a comment here telling me which one is your favourite. That's it!

2. OPTIONAL: For extra entries, become a follower of My Memories on their blog, Facebook page, or Twitter. You MUST come back here and leave a SEPARATE COMMENT for each entry for it to be counted in the draw.

This contest is open internationally (yay!). The winner will be drawn on October 15th, 2011, so get your entries in!

Good luck and happy scrappin'!


Photobucket


PS - Yup, you guessed right, this is a sponsored post, though all text and opinions are my own. In exchange for writing a product review, My Memories Suite has given me a free copy of their software to try out and is giving another free copy to our lucky winner, plus the discount code for any and all of you that care to use it. You're welcome! :-)

{Baby Signs Giveaway Winner}

Click to Enlarge


Thanks to everyone who entered the Baby Signs Giveaway! The fabulous prize, a Baby Signs Complete Starter Kit, goes to Sam (comment # 18). Congratulations, Sam! Your prize will arrive in your mailbox shortly!


Photobucket