.

Showing posts with label {Projects}. Show all posts

{DIY Dinosaur Costume}

Easy DIY Dinosaur Costume

(From Old Pyjamas)

child wearing a DIY homemade dinosaur costume for dress up play


Do you have a dinosaur lover at your house? Sweet Pea is into dinosaurs these days. She turned four yesterday and we are busy preparing for a dinosaur-themed birthday party! Her birthday request was for me to make her a dinosaur costume for dress-up play. As a beginner sewer, this sewing project seemed daunting at first! I turned to Pinterest and saw this and this example, got some advice from a friend, looked through my box of fabric bits to see what I had on hand, and then set out to see what I could come up with on my own. What I discovered is a way to make a DIY dinosaur costume that is actually quite easy, even for beginners, and I just love the final product!

First I took a pair of Sweet Pea's favourite old pyjamas that were too small (as it happens, they had a dinosaur printed on the top, which is why they were her favourites.) I used just one leg of the pyjamas to make the tail. Then I found some shimmery green fabric from an old costume that didn't fit. I used that fabric to make the spikes, but you could use the other PJ leg if you wanted to. 

To make the spikes: To cut out the fabric for the spikes, first I cut a triangle out of cardboard (I used an old cereal box from the recycling bin). I traced around it on a double layer of the green fabric to get my first spike. Then I trimmed about half a centimetre off each side of the cardboard triangle and used that to make the second spike slightly smaller than the first, and so on so that each spike was slightly smaller than the last (see photo below.) I sewed the spikes (right sides in if there's a right side to your fabric) along two sides and left the third side open. Then I popped them right side out and poked the corners straight with a blunt pencil.


To make the tail: I cut the pyjamas up the middle seam, separating the two legs, and continued down the seam to the bottom of one leg. Although the leg fabric was more or less triangular when laid flat, I trimmed it to make it come to a narrower point at the bottom by simply folding it back into its original 'leg' shape and then trimming freehand. 

I laid the open edge of the spikes along the cut edge of the PJ leg - on the right side of the fabric and with the spikes protruding inwards, not upwards in the spiky fashion they end up in. The spikes were in order from the smallest at the end of the tail to the largest at the top. (Be sure that the spike's edge sticks out further than the edge of the PJs.) Then I folded over the PJ fabric so that the two edges were on top of one another, with the spikes inside, and sewed along the whole length together. 


Then I turned the tail right side out and stuffed it loosely with a bit of batting. Finally I just sewed straight across the top to close it up, but I sewed it so that the top lies flat across her back, not flat along the centre seam of the tail, if that makes sense. This way when she wants to wear it, I can just pin it to the top of her pants and it will fall flat and be more comfortable.

To make the top: I was going to use the dinosaur pyjama top, but since it was already too small I thought she'd get more use out of her dinosaur costume if I used a larger top, so instead I used an old t-shirt of her sister's. I cut it open up the centre of the back, and followed the same procedure with the spikes as I had for the tail - laying the spikes in size order on the right side of the t-shirt with the spikes poking downwards, then folding the other edge of the t-shirt fabric on top and sewing along the entire length. 

Finally, I turned it inside out and was relieved to see that I had a super cute dinosaur costume for my little dino lover!

Homemade DIY dinosaur costume made from kids old clothes

Have a dinosaur lover in your household, too? Here are some great ideas for dinosaur-themed birthday gifts and party themes - and a sneak peak at what we're doing for Sweet Pea's birthday! [affiliate links]


Photobucket


{Sew Easy Personalized Throw Pillows for Babies and Kids: A Tutorial for Complete Beginners}

Pin for later:


easy personalized throw pillows for babies and kids tutorial for beginners


I need to preface this post by saying that I am truly a complete beginner when it comes to sewing! Prior to this, I had sewn part of a quilt cover (under supervision of an instructor) that I never finished, and two peacock costumes for Halloween last year (actually I only sewed the feather parts). I'm not sure how I got it into my head that I should attempt to make pillow covers like these, without even a pattern to go by, but I did and I just love how they turned out! So seriously, if I can do it, anyone can! Plus, I already did all the hard parts for you by figuring it all out ;-p ....

{Two Christmas Cards Preschool Kids and Toddlers Can Make}

This year one of our advent calendar activities was to make Christmas cards. Because Princess Pea (age 5) is at preschool during the mornings, our toddler, Sweet Pea (age 2 1/2) ended up making most of these. They are easy enough for toddlers but also fun for older kids to make - I even made some myself and enjoyed them just as much as the kids did!


The red one (made by Princess Pea) and the similar one at the top (by Sweet Pea) were made the same way. They used strips of shiny, metallic tape to make the layers of the tree, then Princess Pea stuck on some 'jewels' to add some extra sparkle to hers. I just love it! For Sweet Pea's I had her do it on plain paper because she really wanted to cut the tape herself and I knew it wouldn't end up in progressively shorter pieces. So I just let her stick on her strips of tape and then I cut it into a triangular shape afterwards (which she was actually quite annoyed about - oops!)

The rest were made by Sweet Pea. They were super easy and look really effective. To start, I gave her a piece of white paper and some bits of coloured tissue paper. I instructed her to tear up the tissue paper into small pieces and glue them all over the white paper (overlapping fine), to cover all the white. I showed her how to do the first piece, glueing both under and on top of the tissue with a solution of watered down white school glue and a paint brush. Then I just let her go at it. She did really well with it  and enjoyed glueing with the paintbrush, and she covered most of the paper. I filled in the blank spaces that were left.

The next day, after the tissue had dried, I cut out as many triangle shapes from the paper as I could get. Then I gave her some folded green construction paper cards and she glued the triangles onto the middle of each card. I cut out some rectangles from brown construction paper and we glued those on as trunks. Some she decorated with glitter glue, bits of sparkly sticky foam, or glitter pens. Others she left plain.

Don't they look lovely?

Photobucket


{Easy DIY T-Shirt Scarf: Time for Mama}

For this month's Time for Mama: Creative Playtime for Moms post, I'm so thrilled to be sharing a guest post by the lovely and creative Emma of Frog, Goose and Bear (and she now has a Frog, Goose and Bear Facebook page, too, for all you other FB-lovers out there). 

Emma's blog is one of the very first blogs I ever read, and I am still immensely inspired by her posts - by her creative "easy-peasy" ideas, by her sweet style, and by her lovely 'clean' blog look. And Emma especially holds an extra-special place in my little blogging world as she was my very first follower-that-I-didn't-know-in-real-life ever! (She was also the inspiration behind one of my most viewed posts, about our Rainbow Pasta Necklaces. See her original Coloured Pasta Made Easy.) In fact, as you'll soon see, Emma knows how to make everything easy for us! 


With three young children and a hard working husband, time for myself is virtually non-existent.  I often find myself staying up way past my bedtime just to get some child free time in the hope of holding on to some sanity!  Although it doesn't always happen, I love to spend this time doing something creative.  I have found that getting my creative juices flowing both energises and revives me.  While some may cherish the feeling they get from the completion of a long and time consuming project, I love nothing more than sitting down to a quick & simple craft that can be finished in no time at all and comes with a sense of accomplishment that can often be hard to come by as a mother. Today I'm going to share with you a super quick and simple project that can give you the satisfaction of completion in less than 20 minutes.  Even better, you don't even need to leave the house to find the things you need!   


UPCYCLED T-SHIRT SCARF
You will need:
- one very large t-shirt (the larger the better)
- a pair of fabric scissors - nothing more!


Step 1.
Trim the seam from the bottom of the t-shirt and discard.


Step 2.
Continue to cut one inch strips in a horizontal line from the bottom of the t-shirt all the way up to just below the sleeves.


Step 3.
Put the neck and sleeves aside and you'll be left with your strips.
If your t-shirt has seams up each side, like mine, you'll need to trim the seam from each end of each strip.


Step 4. Stretch each strip until it starts to curl by pulling gently from each end.


Now you have a pile of stretched strips.  


Step 5. Pick up each strip and tie the ends together one at a time.


Step 6.
When you've tied the ends together, place the strips together with the knots all at the same end.  You're almost done!


Step 7.
Cut a rectangle of fabric from one of the sleeves of the t-shirt.


Step 8.
Wrap this rectangle of fabric around the knots and tuck it into itself.


Et voila - your scarf is finished!


Now you can try it on for size and enjoy wearing a piece of fashion that didn't cost you a thing and made all by yourself in no time at all!  


Thanks so much for having me, Jane. I am really enjoying this Time for Mama series.  Making time for ourselves is so important as a Mum and something that is far too often overlooked.


Thanks so much for sharing this with us, Emma! I need crafts that can be done in no time, or I tend to never complete them - this is perfect for me! I'm definitely going to be trying this!

Photobucket

{Review & Giveaway: Personalized Household Binder by I Heart Organizing}


I love to organize and make lists! Unfortunately, I'm not very good at staying organized when the realities of our busy lives set in. Long work days for two teacher parents, two small children, preschool drop-offs and pick-ups to arrange, meal planning and preparations, multiple caretakers coming and going,... it all gets a bit crazy once the school year starts!


That's why I was so excited when I came across the Household Binder at IHeartOrganizing!


With the Household Binder I hope I can finally organize our family and maintain organization to make for a smoother school year for us this year.


The Household Binder comes with:


* Binder Coversheet w/Spine (with your choice of super cute and colourful design)


* 12 Month Calendar

* Daily Goals 

* Week at a Glance Calendar

* Task Checklist

* Family Outings Idea List

* Monthly Finance Checklist
* Monthly Budget Worksheets

* Home Maintenance Checklist
* Home To Do Checklist
* Cleaning Checklist
* Automotive Maintenance Log
* Important Home Information Worksheets

* Travel Checklist
* Babysitter Notes
* Pet Sitter Notes
* Contacts

* Shopping List
* Meal Planning Calendar
* Freezer Inventory
* Fridge Inventory
* Pantry Inventory

* Blog To Do Checklist
* Password Log

* Important Dates Chart
* Gift Giving Budget Tracker
* Party Planning Checklist

* Media Inventory 
* Library System Tracker


The binder is a downloadable PDF, so you just print it off and pop it in a binder to keep in your kitchen for quick and easy access. You can print off as many copies of pages as you like, or only print the pages that you want. I even chose to laminate some pages for easy write-and-wipe reusing.


I love the cute, colourful designs (and did I mention that it's personalized? You choose the design and then they put your family members' names on it - on the cover and also on the relevant pages inside.) The pages that are my favourites for our family's needs are:


  • * the password log - no more trying out 5 different passwords before coming to the right one! (I don't recommend keeping this page in the binder, though - instead, hide it in a secure spot -- maybe taped to the underside of your desk or inside of a cupboard)
  • * the finance checklist - for keeping track of bills to be paid each month (we so need this!)
  • * the home to-do checklist - to keep our never-ending list of household tasks in one place
  • * the party planner - I expect I will use this one A LOT! I always make pages of lists for party planning then wish I had kept them to remember the next time! This is one I am definitely laminating.
  • * the travel checklist - this is sorted into items 'to pack' and items 'to do'. I recommend writing in a few basics (you'll always need to pack your toothbrush and pyjamas and you'll always need to take out the garbage before you leave), then laminating the page. That way, you have your basics always on there and can add other items specific to a particular trip.
  • * the babysitter notes - again, I recommend filling in some of the items (like notes about each kid) then laminating it for re-use each time you go out
  • * the meal planning calendar and associated shopping list - I love how they are related and the shopping list has a place to write the meals that you have planned for the week.
  • * and for me: the blog ideas list - great to jot down ideas when I don't have the computer on.

Negatives? Well, I think it is a little bit pricey when you consider the printing costs. But I look at it as an investment in the family's happiness. A better organized family = a smoother functioning family = happier and less-stressed parents = happier kids! And with better organization, there's less time wasted on trying to find/remember/decide things, making more time to play and have fun together as a family! Definitely worthwhile!

(There are also lots of options to buy single pages rather than the full binder - check out the I Heart Organizing Etsy shop. And check out the free printables available at IHeartOrganizing too!)

*ADDITION: I Heart Organizing would like to offer up a free downloadable Household Binder for one lucky Mama Pea Pod reader! To enter, leave a comment below stating which style of cover you would choose (you can see the choices here). Open internationally. Contest closes Sept. 8th, 2012. 


Photobucket


Please note: This is a sponsored post. In exchange for writing a review of this product, I received a free downloadable PDF of the Personalized Household Binder. However, I strive to provide a balanced review for my readers and all opinions expressed in this review are my own, true opinions.

{Mermaid Party Invitation Cards}

Like Mama Pea Pod for birthday party ideas? Please consider throwing a vote our way in the Red Tricycle Most Awesome awards for Birthday Party Ideas! Thanks so much! x


June is Mermaid Month at Mama Pea Pod! Why? Because it's Princess Pea's birthday month, and this year her party theme is mermaids! 

That means that we are going mermaid crazy at the moment! If you didn't already see it, be sure to check out the Mermaid Waldorf Doll tutorial from this month's Time for Mama guest post by Taming the Goblin - and enter to win the doll in the tutorial. And for the kids' creative time, give them a go at making mermaid handprint paintings - we had so much fun doing ours!

So, the first way to set the stage for a birthday party is, of course, the invitations. Here's how we made some beautiful, sparkly mermaid party invitations!

These were inspired by the Usborne book "Mermaid Things to Make and Do" - as you may know if you've been following for a while, we love the 'Things to Make and Do' series from Usborne; we have several of them (no, this is not a sponsored post - we just really, really love them!).


Now, because of the fiddly pieces, I ended up doing most of the 'labour' for these, while Princess Pea made the selections for which papers to use, which pieces to stick where, etc., and stuck on some of the less fiddly bits. She doesn't have a lot of patience for fiddly things, but an older child could do it independently. 


First, we got some good quality, blue card stock from the stationary shop, folded in half, and, using coins to draw around, made the cut-outs for the waves along the top.


Then we used some skin-coloured-ish bits of scrapbooking paper to make the torsos, arms, and heads separately. Next, we used various scraps of scrapbooking papers and old stationary envelopes to cut out hair, clothes, accessories, and various sea creatures.


Finally, we used some sparkly green craft foam to make the mermaid tails. Then we stuck each piece onto the card, making sure part of each mermaid went over the edge of the card, creating a 3-D effect. (You could make them even more 3D by using those foam stickies to attach them, instead of glue.) As a final touch, we drew faces on the mermaids and sea creatures with a pen.

We just love how they turned out!

Photobucket

Sharing at: Crafty Moms Share

{Swedish Woven Paper Heart Baskets}

Swedish Woven Paper Heart Basket Craft


In Sweden, Santa Lucia, or Saint Lucia's Day, on December 13th is a big part of the Christmas advent tradition. To celebrate Santa Lucia, we made these adorable Swedish Hearts. They are perfect for hanging on the Christmas tree, filled with small treats for guests! 


I originally made these with my 4th and 5th grade students a few years ago around the time of Santa Lucia, when we were talking about Swedish traditions. See more about the Santa Lucia tradition and hear the traditional song in this video. 

I have my colleague to thank for finding this printable template. 

Once we figured it out and got the hang of it, they were so easy and quite addictive! Princess Pea and I then made several more to put little goodies in for friends and colleagues for holiday treats. This latest one will be a Valentine for Princess Pea's little friend who is moving away soon. Haven't yet decided what to fill it with (right now there's just a bunch of foam hearts [affiliate link] in it). Any suggestions?
*Update: We also made them as favour bags for Sweet Pea's pink and red heart-themed birthday party.

So to make them, I'd suggest printing out the template linked above, at least to start out until you get the hang of the necessary proportions. (If you choose to free-hand it instead, it's important to make sure the slits are slightly longer than the width of the whole shape.) Make sure that you fold your paper in half and line up the straight edge along the fold. Then use the template to trace and cut out the shapes from two different papers and cut the slits as shown. (If you're making these for Valentine's Day, it's nice if you have some Valentine-themed paper, or for Christmas, some Christmas-themed paper. [affiliate links])


how to cut the paper to make a swedish woven paper heart basket

Next comes the weaving part, which is the part that was tricky at first. I'll try to explain it with our flowery and red papers. Take the far right 'arm' of the flowery paper and insert into the far left arm of the red paper. Then take the middle arm of the red paper and insert into the far right arm of the flowery paper. Then take the far right arm of the flowery paper and insert it into the far right arm of the red paper. Slide it along towards the top of the heart.


how to weave the paper to make a swedish woven paper heart basket - step 1

At this point you should have the first (far right) arm of the flowery paper woven through all three arms of the red paper. Note that each time, you insert the arm of one into the arm of the other, don't just go front to back or else you won't end up with a 'pocket' that opens in the end. (This is where we went wrong at first.)


how to weave the paper to make a swedish woven heart basket - step 2

Then you take the middle arm of the flowery paper and do the same in reverse: The far left arm of the red paper into the middle arm of the flowery paper; the middle arm of the flowery paper into the middle arm of the red paper; and the far right arm of the red paper into the middle arm of the flowery paper.

And finally, do the reverse with the far left arm of the flowery paper. The last one is a bit tricky, so you have to do it carefully.

This wasn't a craft that Princess Pea (aged 4) was able to make on her own, of course, but she traced and cut out the papers and we did the weaving together until it got too hard and then I finished it off. And she loved getting to use the hole punch and stringing the ribbon through to make a little hanger for it.


swedish woven paper heart basket - finished


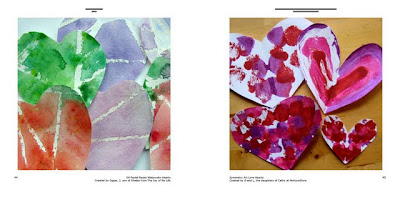
This project is featured in a book available at Hands On: As We Grow as part of The Heart Project, a fundraiser to support the American Heart Association. Please consider ordering a copy of this book full of beautiful heart-themed art and craft projects with links to tutorials (available as both a printed book and as an e-book). All proceeds will be donated to the AHA.

the heart project collaborative blogger fundraiser for the american heart association

{The Heart Project}

Today I am reposting an old post from last year (down below), for two reasons. One reason is that I'm pretty sure nobody saw this post except my mum and maybe a few friends as it was one of my earliest posts, and since Valentine's is rolling around again, I thought I'd share it with a few more of you. The second, and more important, reason is because it ties in nicely to introduce a heart-themed fundraiser project organized by Jamie of Hands On: As We Grow.


Jamie has put together a beautiful book of 'heart' art, crafts, and foods, titled The Heart Project, to raise money for the American Heart Association. It is a compilation of over 100 heart-themed projects made by or with kids from bloggers all over the world, with links to tutorials for each one. It is available in ebook format for $5 or paper book format for $20, and all proceeds will go to the American Heart Association. Please consider buying a copy and/or making a donation to the AHA at Hands On: As We Grow's Heart Project. This book is only available during this month of February, so don't miss out on this very special opportunity to make a difference and to own your very own copy of this beautiful book.


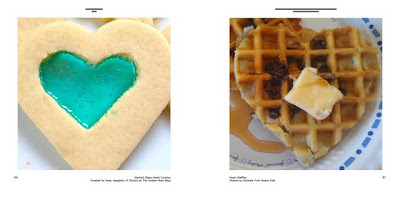
Here's a little sneak preview of the book:


You can read more details about this project (including accompanying giveaways!), buy your copies, or make a donation to the AHA over at Hands On: As We Grow.


Please stop by and thank the bloggers participating for their contributions to this project. They are:

hands on : as we grow
♥
A Little Learning for Two♥ Among Many Blessings
Angelique Felix
♥
At Home with Ali♥ Broken Treasures
Busy at Home
♥
Busy Kids Happy Mom♥ Carrie Saindon's Photo Journey
Child Central Station
♥
Classified: Mom♥ Classroom Magic
Creative with Kids
♥
Creativity My Passion♥ Critters and Crayons
De Tout et de Rien
♥
Dilly-Dali Art♥ Dinosaurs & Octopuses
Excited 2 Learn
♥
Hand Over the Cookies♥ Handprint & Footprint Art
Happy Hooligans
♥
Heart Journey♥ Imagination Soup
Jamie's Jumble
♥
Kitchen Counter Chronicles♥ Kreative Resources
Let Kids Create
♥
Little Illuminationss♥ Living Montessori Now
Loudness of the Lambs
♥
Love and Lollipops ♥ Mama, hocemo nesto da pravimo
Mama Pea Pod
♥
Mama Smiles ♥ MemeTales
Messy Kids
♥
Mindful Meanderings ♥ Mom to 2 Posh Lil Divas
Mommy Labs
♥
Mommy Perks ♥ Mum Paints Lives
Mummy Mummy Mum
♥
My Creative Family ♥ NurtureStore
One Artsy Mama
♥
Peace Love & Rainbows ♥ Play Dr Mom
Putti Prapancha
♥
Rainbows within Reach ♥ Reading Confetti
Ready. Set. Read!
♥
Red Ted Art ♥ Sense of Wonder
Share & Remember
♥
Stacy Molter ♥ Sun Hats & Wellie Boots
Teach Preschool
♥
The Artful Child ♥ The Chocolate Muffin Tree
The Craft Barn
♥
The Educators' Spin on It ♥ The Golden Gleam
The Imagination Tree
♥
The Iowa Farmer's Wife ♥ The Joy of My Life
The Kids Fun Review
♥
The Outlaw Mom Blog ♥ The Preschool Toolbox
The Seeds Network
♥
Toddler Approved


♥♥♥♥♥♥♥♥♥♥

{Princess Pea's First Valentine}
(Originally published on February 14th, 2011)


Last week we started talking about Valentine's Day and how it's a special day when you tell people how much you love them. Princess Pea, of course, absorbs every detail.

On Tuesday she went to a kids' concert. The musician is a popular local kids' singer. His music is actually very good, even though I can't understand most of the lyrics. Anyway, Princess Pea loves his music and thinks he's one of her friends. So when we got to the concert she bravely sat herself down on the floor at the front, in amongst a group from a local preschool (Sweet Pea and I sat further back on a chair). When he finally came out onto the stage, Princess Pea jumped up and started waving wildly - very cute!

At the end of the concert, the performer waved goodbye to all the kids, and Princess Pea again jumped up and started waving wildly. He saw her and gave her her own special wave and big smile - wow! She was sooooooo thrilled!

So on the way home she announced that she wanted to make him a Valentine's card ("I think I love him!"). Too cute! So all last week she's been working on making Valentine's cards. Here are the results - pretty good I think!


For the one above (this is the one for the musician), I made a cardboard heart template, which she traced and cut out by herself, then she decorated it with stickers.


For this one, she used a heart-shaped stamp and red and white paint to stamp hearts onto the pink paper, then she glued it onto a folded paper that I had cut and folded for her.


For the next one, she first used her heart stamp marker to stamp all over a square of pink paper. Then she traced and cut out a heart from it using the template, then used the 'negative space' to stick onto a square of paper then stuck that onto the card. 


This is the heart that she cut out from the space in the card above, which she stuck onto another heart that she had traced and cut out using the template.


The last one is the card I made for her from Daddy, Sweetpea and I.
I used a ribbon to hang it on her chair, so she'd find it when she came out for breakfast.


Photobucket